How to Install Metal Stud Furring Wall for Optimal Results?
Installing a Metal Stud Furring Wall can significantly enhance your building project. This method provides added strength, insulation, and a smooth surface for various finishes. With the right approach, you can achieve optimal results in your construction endeavors.
Proper installation of a Metal Stud Furring Wall requires attention to detail. Start by ensuring all materials are of high quality. Familiarize yourself with the tools needed. Each step must be executed with care to avoid potential issues later. Mistakes here can lead to costly repairs.
Consider the layout and design carefully. Measure accurately to maximize efficiency. Note that working with metal can be tricky. Ensure you follow safety precautions to minimize accidents. Reflect on your work process and be willing to adapt. With these practices, your Metal Stud Furring Wall will stand the test of time.
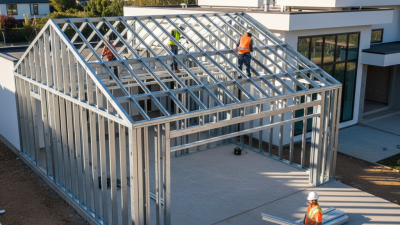
Choosing the Right Metal Studs for Your Furring Wall Project
Choosing the right metal studs for your furring wall project is crucial for achieving stability and durability. Start by considering the gauge of the metal stud. A lower gauge number indicates a thicker metal, which adds strength. For most residential applications, 25-gauge studs are a good choice. They provide a balance of durability and cost-effectiveness.
Tips: Always check local building codes. They may require specific gauges or standards. Opt for studs that suit your wall type, whether it’s for insulation or sound proofing.
Another key aspect is the length of the metal studs. Measure your wall height carefully before purchasing. Studs that are too short can lead to structural issues, while excessively long studs waste materials.
Tips: Bring a tape measure when shopping. Double-check your measurements to avoid mistakes. Evaluate how studs interact with your existing structures. Furring walls should align with electrical or plumbing systems to avoid future inconveniences.
Metal Stud Furring Wall - Material Cost Comparison
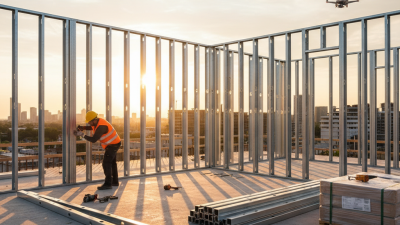
Preparing the Surface and Tools for Installation
Preparing the surface for installing metal stud furring walls is crucial. Start by clearing the area. Remove any debris or old finishes. Ensure the walls are dry and free from mold or contaminants. Inspect for any uneven spots. A level surface promotes a smooth installation process.
Tools are just as important as preparation. Gather essential items like a measuring tape, level, and cutting tools. A power drill is invaluable for securing metal studs. Additionally, safety gear, including goggles and gloves, should be on hand. Preparing these tools beforehand can save time and prevent interruptions during installation.
Don't underestimate the value of accurate measurements. Miscalculations can lead to uneven walls. Double-check measurements before cutting materials. It's easy to make mistakes, but taking a moment to reflect on your work can make a difference. Plan your approach and stay organized to achieve optimal results.
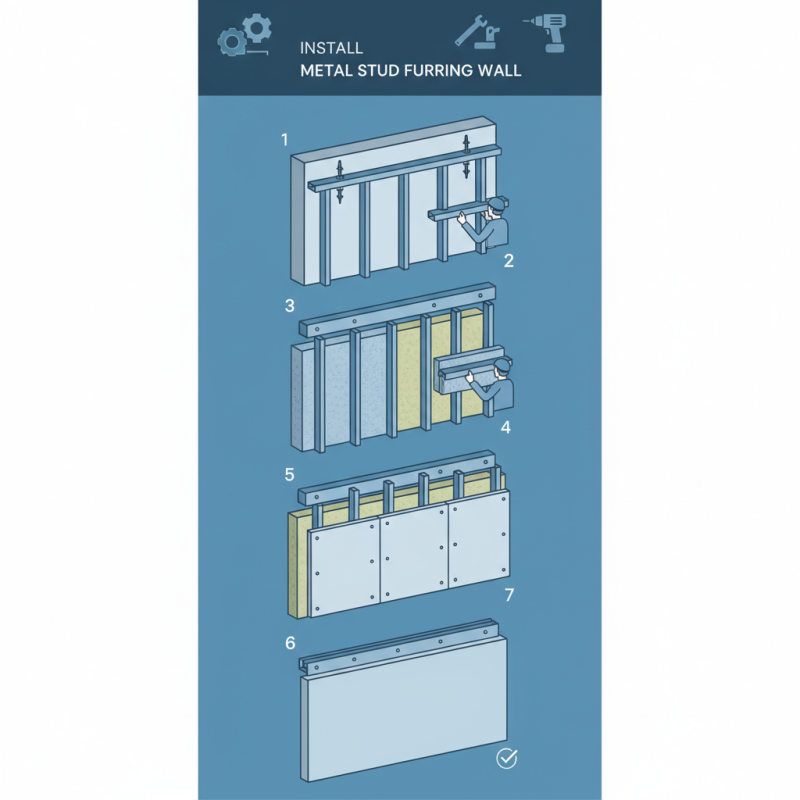
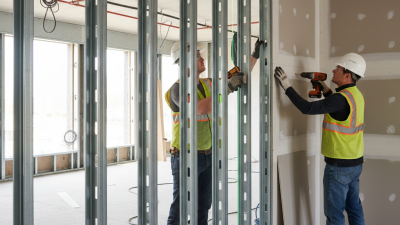
Step-by-Step Installation of Metal Stud Furring Walls
Installing metal stud furring walls allows for better insulation and surface support.
To start, gather the necessary tools and materials. Concrete screws,
metal studs, and a level are essential. Begin by marking the wall layout
on the floor and ceiling. This step ensures precision when installing the studs.
Tips: Always double-check your measurements. A small mistake can lead to uneven walls.
It's beneficial to use a chalk line for accuracy.
Attach the track to the floor and ceiling. Use a drill to secure the track with concrete screws if needed.
After installing the track, cut the metal studs to fit between them. Insert the studs into the track. Ensure they are plumb
with the help of a level.
Tips: Don't rush this step. Misalignment can create issues later on.
It’s important to have someone assist you to hold the studs in place while securing them.
Finally, add insulation between the studs if desired. Finish the wall by attaching drywall, making sure to stagger the joints.
Reflect on your work to check for any irregularities.
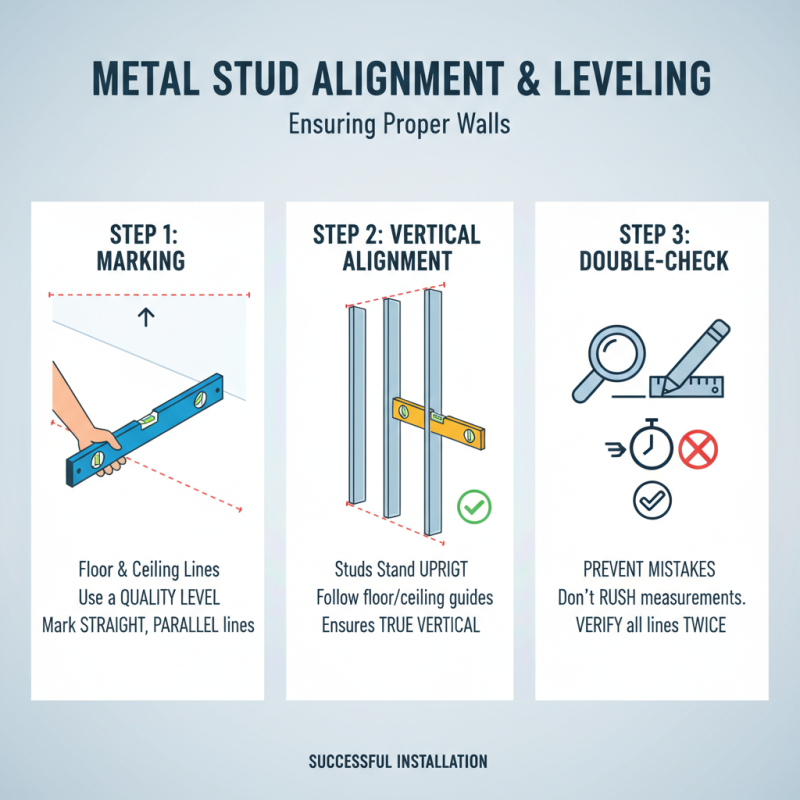
Ensuring Proper Alignment and Leveling Techniques
Aligning and leveling metal stud furring walls is crucial for a successful installation. Start by using a quality level to mark a straight line on the floor and ceiling. This ensures that your studs will stand vertically upright. Mistakes often occur when measurements are rushed. Take your time to double-check every line before moving to the next step.
To achieve optimal results, you should double-check the placement of each stud. Spacing between studs should remain consistent, usually 16 or 24 inches on center. Using a laser level can aid in identifying any discrepancies in height. If your studs are not level, it may lead to issues later on, such as difficulty hanging drywall.
Remember that small errors can snowball into significant problems. Each stud must sit flush against the wall surface. Pay careful attention to the integrity of your frame. If you spot any misalignments, feel free to remove and adjust the studs. This dedication to precision can save you time and hassle in the long run.
Finishing Touches: Insulation and Wallboard Installation
When finalizing a metal stud furring wall, insulation and wallboard installation are crucial. Start by selecting appropriate insulation material. Fiberglass batts are common, but other options exist. Ensure the insulation fits snugly between the studs, minimizing gaps that might compromise energy efficiency. Cutting the insulation to size can be tricky. It may require a few attempts to achieve a perfect fit.
Next, focus on installing the wallboard. Measure twice before cutting, as mistakes can lead to wasted materials. For a smoother finish, stagger your joints. This creates a more durable wall. Use screws instead of nails for a tighter hold. Remember, securing the wallboard correctly is vital for both aesthetics and stability. Pay attention to corners and edges; they often need extra care.
Double-check your work throughout the process. Look for uneven seams or exposed edges. These imperfections can be fixed easily but require diligence. Keeping a consistent inspection routine can save time later. Always be prepared for minor setbacks, as construction rarely goes precisely as planned. Even small details matter in achieving a quality finish.
How to Install Metal Stud Furring Wall for Optimal Results?
| Step |
Description |
Materials Needed |
Estimated Time |
| 1 |
Prepare the area by clearing any obstructions and measuring the wall space. |
Measuring tape, utility knife |
30 minutes |
| 2 |
Install vertical metal studs at marked locations, ensuring they are level. |
Metal studs, level, screws |
1 hour |
| 3 |
Attach horizontal furring channels between vertical studs. |
Furring channels, screws |
1 hour |
| 4 |
Install insulation in between the furring channels for thermal and sound resistance. |
Insulation batts |
30 minutes |
| 5 |
Finally, attach wallboard over the furring channels to complete the wall. |
Wallboard, screws, drywall knife |
2 hours |