Leave Your Message
Building a Metal Stud Garage requires more than assembling lightweight steel sections around a concrete slab. The structure must resist wind, snow, moisture, and everyday impact. A reliable project begins with a level foundation, accurate measurements, and a clear load path from the roof to the ground. Local building requirements also matter, so a qualified professional should review the design before construction begins.
This guide explains how to plan and build the frame with practical detail. You will see how tracks, studs, anchors, bracing, sheathing, and garage-door openings work together. Small errors can become expensive. A misplaced anchor may affect the entire wall line. Poorly protected steel can develop corrosion near wet floors or exposed edges. Follow the stud manufacturer’s instructions, use suitable fasteners, and confirm spacing with an engineer when loads are uncertain.
Details make the difference.
A successful Metal Stud Garage should feel solid, dry, and easy to maintain. Insulation, ventilation, electrical planning, and drainage deserve attention before the walls are closed. I have also learned that speed can create rework, especially when measurements are assumed instead of checked. That weakness is worth admitting. Good construction is not about pretending every step is perfect. It is about inspecting each connection, correcting mistakes early, and keeping clear records of materials and changes. With careful preparation and professional review, this project can deliver a durable garage that serves for many years.
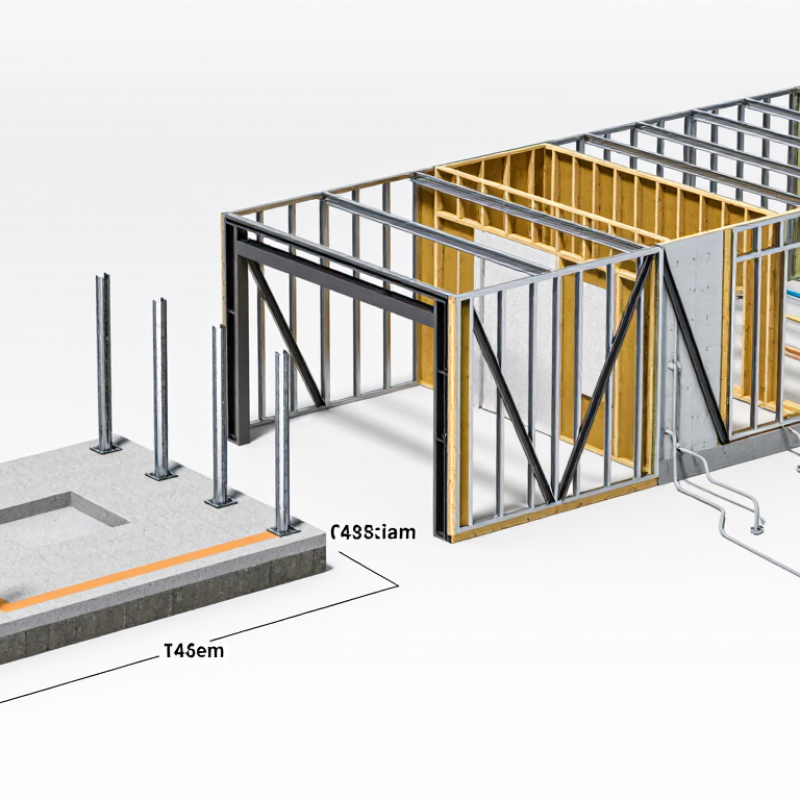
Planning a metal stud garage starts with the layout, not the framing. The 2023 U.S. Census Bureau housing data shows that about three in five new single-family homes include a two-car garage. Measure each vehicle, then add door swing space, storage depth, and a clear walking path. A practical two-car layout often needs roughly 24 by 24 feet. My first sketch was too optimistic. Shelving quickly consumed nearly two feet along one wall.
Budgeting should separate the slab, framing, roof, doors, insulation, electrical work, drainage, and permits. The 2024 National Association of Home Builders Cost of Constructing a Home Survey reported an average construction cost near 162 dollars per square foot for new homes. That figure is not garage-specific, but it gives a useful regional benchmark. Metal studs may reduce handling time, yet connectors, bracing, corrosion protection, and skilled labor can raise the final cost. Keep a 10 to 15 percent contingency.
Building requirements must be checked before ordering materials. Confirm zoning setbacks, height limits, property lines, snow loads, wind loads, and frost depth with the local authority. The International Residential Code generally requires a properly designed foundation, structural anchorage, weather protection, and fire separation where the garage meets living space. Plan circuits, lighting, ventilation, and drainage early. Steel framing also creates thermal bridges. Continuous insulation may be necessary. Small omissions become expensive later.
| Planning Category | Dimension or Data Point | Recommended Planning Value | Typical Range or Calculation | Practical Building Requirement |
|---|---|---|---|---|
| Garage Layout and Space Planning | ||||
| Overall garage footprint | Width × length | 24 ft × 24 ft | 576 sq ft of floor area | A practical starting size for two vehicles, storage, and a small work area. |
| Interior clear height | Finished floor to ceiling | 9 ft minimum | 9–10 ft is commonly planned for vehicles, lighting, and overhead storage. | Allow additional height if a vehicle lift, tall shelving, or a steeper roof structure is required. |
| Vehicle parking area | Width × depth per vehicle | 10–12 ft × 20–22 ft | Two spaces require approximately 400–525 sq ft before adding circulation and storage. | Confirm vehicle dimensions, door swing, wall clearance, and local accessibility requirements. |
| Overhead garage door | Opening width × height | 16 ft × 7 ft for two cars | Single-car openings are commonly 8–10 ft wide and 7–8 ft high. | Frame the opening with a structural header designed for the wall and roof loads. |
| Side entry door | Door width × height | 3 ft × 6 ft 8 in | A wider 36-inch door improves access for equipment and stored materials. | Provide a landing, weather protection, and an exterior step or ramp where required. |
| Storage and work zone | Depth along one wall | 2–3 ft | 18–24 inches for shelving; 30–36 inches for a usable workbench. | Keep storage clear of vehicle doors, electrical panels, heating equipment, and required exits. |
| Vehicle maneuvering space | Driveway apron depth | 24–30 ft minimum | More space may be needed for large vehicles, trailers, or a narrow approach. | Check property boundaries, drainage, turning movements, and local driveway rules. |
| Metal Stud Framing and Building Envelope | ||||
| Exterior wall framing | Stud depth and spacing | 3 5/8–6 in structural steel studs at 16 or 24 in on center | Stud size and gauge depend on wall height, wind, snow, cladding, and openings. | Use structural, load-bearing members for exterior walls; standard drywall studs are not automatically suitable. |
| Wall height | Top of slab to top plate | 9–10 ft | Taller walls may require heavier studs, closer spacing, or intermediate bracing. | Have structural members and connections checked for local wind and seismic conditions. |
| Roof slope | Rise per 12 inches of run | 4:12 minimum planning slope | Common residential-style planning slopes range from 4:12 to 6:12. | Follow the roofing material manufacturer’s minimum slope and local snow-load requirements. |
| Wall sheathing | Exterior structural layer | 7/16–1/2 in structural sheathing where specified | Thickness and fastening depend on the structural design and cladding system. | Provide continuous load paths from roof to foundation and install approved fasteners at required spacing. |
| Thermal insulation | Wall and roof insulation | R-13 to R-21 walls; R-30 to R-49 roof or ceiling | Exact values vary by climate zone and adopted energy code. | Include air sealing, vapor-control strategy, and thermal bridging treatment at metal framing. |
| Exterior cladding | Wall finish | Metal panels, fiber-cement siding, or masonry veneer | Budget approximately $6–$18 per sq ft of wall area installed, depending on system. | Use a weather-resistant barrier, flashing, corrosion-resistant fasteners, and properly detailed penetrations. |
| Foundation, Slab, and Site Requirements | ||||
| Concrete slab | Thickness | 4 in typical for ordinary vehicle storage | 5–6 in may be required for heavier vehicles, lifts, concentrated loads, or local conditions. | Use a compacted granular base, reinforcement as designed, control joints, and a finished elevation above surrounding grade. |
| Concrete strength | Specified compressive strength | 3,000–4,000 psi typical planning range | Local specifications may require a different strength or exposure class. | Confirm mix design, curing, reinforcement, and frost-protection requirements before placement. |
| Foundation edge | Thickened edge or footing | Designed for soil and frost conditions | Depth may range from a shallow thickened edge to a frost-depth footing. | Foundation design must account for soil bearing capacity, frost heave, drainage, and local code. |
| Site preparation | Excavation and grading | Level, compacted, and drained building pad | Allow approximately $3,000–$8,000 for ordinary site preparation. | Costs increase for demolition, rock excavation, retaining walls, poor soil, or long utility runs. |
| Drainage | Finished floor elevation | Higher than adjacent finished grade | Use positive surface drainage away from walls and doors. | Do not direct roof runoff toward the slab, neighboring property, septic systems, or foundations. |
| Permits, Codes, and Utilities | ||||
| Building permit | Permit status | Required in many jurisdictions | Fees commonly range from $500–$3,000, excluding design or impact fees. | Verify zoning, setbacks, lot coverage, height limits, easements, and permit requirements before purchasing materials. |
| Structural engineering | Plans and calculations | Recommended and sometimes mandatory | Allow approximately $1,500–$5,000 for site-specific structural design. | Design should address wind, snow, seismic forces, roof loads, openings, connections, and foundation conditions. |
| Electrical service | Subpanel capacity | 60–100 amp feeder for a typical garage | Higher capacity may be necessary for welding equipment, electric vehicle charging, compressors, or heating. | Use licensed electrical work where required and install grounding, GFCI protection, lighting, and dedicated circuits. |
| Lighting | Interior illumination | 50–75 lumens per sq ft for general work areas | A 576 sq ft garage may need approximately 29,000–43,000 lumens for bright general lighting. | Use separate circuits or switching zones for vehicle bays, workbenches, storage, and exterior areas. |
| Ventilation | Air movement | Code-compliant natural or mechanical ventilation | Mechanical ventilation may be needed where vehicles, fuel, chemicals, or combustion appliances are present. | Never use a garage as living space without meeting the separate requirements for habitable rooms. |
| Fire separation | Dwelling-to-garage protection | Protected wall, ceiling, and connecting door where applicable | Requirements vary with attachment, occupancy, and local residential code. | Use a self-closing, appropriately rated connecting door and protect penetrations as required by the adopted code. |
| Preliminary Budget for a 24 ft × 24 ft Detached Garage | ||||
| Design, permits, and inspections | Professional and municipal costs | $2,000–$8,000 | Includes preliminary drawings, engineering allowance, permits, and inspection-related fees. | Actual costs depend on jurisdiction, site complexity, and whether engineered plans are required. |
| Site work and excavation | 576 sq ft building pad | $3,000–$8,000 | Includes ordinary grading, base preparation, and limited soil removal. | Exclude major retaining walls, contaminated soil, ledge rock, and extensive demolition from this allowance. |
| Foundation and concrete slab | Approximately 576 sq ft | $8,000–$15,000 | Includes a typical reinforced slab and foundation edge under ordinary site conditions. | Frost-depth foundations, thicker slabs, floor drains, or difficult access can increase the total. |
| Metal framing and structural shell | Walls, roof framing, sheathing, and bracing | $12,000–$22,000 | Pricing varies with steel gauge, spans, openings, engineering, and local labor rates. | Do not substitute nonstructural interior drywall studs for engineered exterior structural framing. |
| Roofing and exterior enclosure | Roof, siding, weather barrier, flashing | $7,000–$14,000 | Includes a basic durable enclosure without premium architectural finishes. | Include roof drainage, eave detailing, snow retention where applicable, and corrosion protection. |
| Doors and windows | One double garage door, one service door, limited windows | $4,000–$10,000 | Cost depends on door size, insulation, glazing, opener, hardware, and installation conditions. | Coordinate rough openings and header design before framing begins. |
| Electrical and lighting | Subpanel, circuits, outlets, and fixtures | $3,000–$8,000 | Excludes unusually long underground feeders and major service upgrades. | Plan future circuits before walls are closed, especially for charging, welding, heating, or compressors. |
| Interior finish and ventilation | Insulation, wall lining, minor storage, and ventilation | $5,000–$12,000 | Basic unfinished interiors cost less than insulated, lined, and climate-controlled spaces. | Use fire-resistant and moisture-tolerant finishes suitable for a garage environment. |
| Total preliminary construction allowance | Complete 576 sq ft detached garage | $44,000–$97,000 | Approximately $76–$168 per sq ft, excluding land, major utility upgrades, and unusual site conditions. | Obtain local quotes and add a 10–15% contingency for design changes, material escalation, and concealed conditions. |
| Planning note: Costs and code requirements are broad U.S. planning ranges, not a construction quotation. Final dimensions, member sizes, foundations, fire protection, energy performance, and permits must be verified with the local building department and qualified design professionals. | ||||